

If your PC powers on but shows no display, cycles on and off, or hangs on a motherboard debug light, you are trying to decide how to reseat a GPU and RAM to fix boot problems safely and effectively. This decision matters because a loose card or memory stick can mimic a failed component, and the right approach depends on your resolution and refresh target, your platform and socket, your case size and clearance, your power budget, and whether this is a current fix or your next upgrade opportunity.
This guide gives you a practical framework for choosing when and how to reseat, what to check before you touch anything, and how to avoid creating new issues. You will learn what actually matters for a reliable fix, see a few options that show the range of reference material you can use, and match the steps to your specific build scenario. For broader context on diagnosing issues, you can also browse the Troubleshooting & Optimization archive for related how-tos.
What Actually Matters
When Reseating Helps and When It Does Not
Reseating helps when the connection between the component and the slot is incomplete, oxidized, or slightly misaligned. You should consider it first if the system was recently moved, cleaned, upgraded, or shipped, if you see a VGA or DRAM debug LED lit, if you hear beep codes for graphics or memory, or if the system boots intermittently after you wiggle cables. Owners commonly report that no display with fans spinning, or a boot that requires multiple power cycles, often traces back to a GPU or RAM stick that is not fully seated.
Reseating is less likely to help if you have no power at all, a burning smell, liquid damage, or a clear BIOS or storage error message that points elsewhere. In those cases, focus on power delivery, storage, or firmware before you pull cards. If you recently changed BIOS settings, enabled an aggressive memory profile, or updated firmware, note that BIOS updates and overclocking are done at your own risk and may void warranty, so restore defaults first and document your original settings.
Power, Safety, and Anti-Static Prep
Good prep prevents damage and makes the fix more reliable. Shut down fully, flip the power supply switch off, and unplug the wall cable. Press and hold the case power button for a few seconds to drain residual charge, then work on a non-conductive surface with good lighting. Use anti-static handling throughout, wear a grounded wrist strap if you have one, touch bare metal on the case frequently, and avoid working on carpet or in socks that build static.
Give yourself room and time. Clear your workspace, keep screws and caps in a small tray, and take a quick photo of cable routing and slot population before you remove anything. Check your case manual for cooler height or radiator clearance against your case, and follow the manufacturer mounting instructions if you need to move a cooler or bracket to access latches. If you need background on how platform layout affects access, the Motherboards & Compatibility section explains socket and slot placement that can affect how you reach retention clips.
GPU Reseating: Slot, Latch, Power, and Clearance
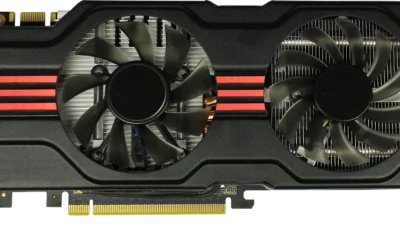
For graphics, the goal is a straight, fully seated connection with even pressure and secure power. Identify the primary PCIe x16 slot, usually the top slot closest to the CPU, and note the retention latch at the end of the slot. Remove display cables, unscrew the bracket screws, disconnect PCIe power cables with the clip depressed, release the slot latch gently, and lift the card straight up without rocking it side to side. Inspect the slot and the card edge connector for dust or debris, blow out dust with brief bursts of air, and check that no cables will snag when you reinstall.
Reinstall by aligning the connector with the slot and the bracket with the case openings, then press firmly and evenly until the latch clicks. Reconnect PCIe power until each clip clicks, secure bracket screws without overtightening, and reconnect display output to the GPU, not the motherboard, unless you are intentionally using integrated graphics for diagnosis. If your case is compact or your GPU is large, verify that the card does not press against front radiators, drive cages, or power cables, and review airflow guidance like how to choose an airflow case for a hot GPU to understand clearance tradeoffs that make reseating harder.
RAM Reseating: Channels, Clicks, and Compatibility
For memory, correct slot choice and a confident click matter more than force. Consult your motherboard manual for the preferred slots for one or two sticks, often the second and fourth slots from the CPU for two modules, and open both retention clips. Lift each stick straight up, inspect the gold contacts and the slot for dust, and look for bent pins or debris. Avoid touching the gold contacts, handle sticks by the edges, and keep them away from static sources.
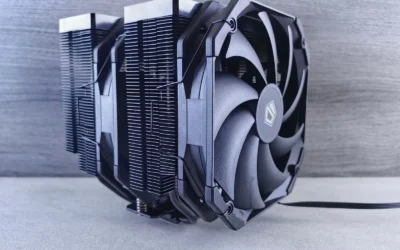
Reinstall by aligning the notch with the key in the slot, then press straight down with thumbs near both ends until both clips snap shut on their own. Do not leave a clip half open, and do not rely on pushing only one side. If you use a large air cooler that overhangs the DIMM slots, check cooler height and RAM clearance against your case and cooler specs, and follow the manufacturer mounting instructions if you need to temporarily shift a fan for access. For background on how memory speed and platform interact, see Graphics Cards and platform guides that discuss balanced builds, since an unstable memory profile can look like a seating issue.
A few options that show the range of step-by-step reference material can help you compare depth, style, and troubleshooting flow before you choose a guide to follow:
This article contains affiliate links. If you buy through one of our links, CustomPCGaming may earn a commission at no extra cost to you. Commissions never influence which products we recommend or how we rank them. Read our Affiliate Disclosure for details.
Quick Picks at a Glance

Prime DIY Computer Repair Handbook: Diagnose Issues

Prime How to Diagnose & Fix PC Hardware Failures
As an Amazon Associate we earn from qualifying purchases. Product prices and availability are accurate as of the date/time indicated.
Pros
- Covers a wide range from basic maintenance to hands-on repairs for all skill levels
- Includes detailed illustrations and step-by-step instructions for easier learning
- Emphasizes safety, data protection, and time saving diagnostic techniques
- Part of The Fixers Handbook series focused on practical DIY skills
Cons
- Print Replica format and lack of Enhanced Typesetting limits readability and customization on Kindle devices
- Attempts to serve both beginners and advanced users, so depth may vary by topic
- Lacks advanced interactive features like X-Ray and Word Wise for enhanced study
This is a comprehensive Kindle guidebook from The Fixers Handbook series designed to help both beginners and more experienced users take control of PC maintenance. It is ideal for home users, students, and DIY enthusiasts who want to understand their computers and avoid costly service calls.
The book covers diagnostics, preventative maintenance, component upgrades, and common repairs like RAM replacement and power supply troubleshooting. Its step by step instructions and detailed illustrations make complex tasks more approachable and help users resolve slowdowns, crashes, and error messages more efficiently.
As a Print Replica Kindle edition, the layout preserves the original print design with illustrations and guides. However, the lack of Enhanced Typesetting, X Ray, and Word Wise support means the reading experience is less flexible on different devices and font adjustments are limited.
The guide tries to serve both novices and advanced users, so some sections may feel too basic for pros or too dense for complete beginners. With a mixed reception, buyers should expect a solid introductory handbook rather than a deep technical manual for specialized repairs.
Overall, this handbook offers practical value for anyone wanting to build confidence in PC troubleshooting and upgrades. If you want a budget friendly, all in one reference to extend your PC lifespan and improve performance, this is a worthwhile starting point.
ASIN: B0D46PC92B, Part of The Fixers Handbook series. Publication date May 14, 2024. Language English with a file size of 2.7 MB.
Format: Print Replica Kindle edition. Enhanced Typesetting, X Ray, Word Wise, and Page Flip are not enabled, which preserves print layout but limits text reflow options.
Category: Do-It-Yourself with rankings in Computer Hardware Upgrade and Repair and Computer Operating Systems. Content focuses on diagnostics, maintenance, upgrades, and DIY repairs with illustrations.
Pros
- Clear, jargon free language accessible to complete beginners
- Practical flowcharts and checklists speed up real world troubleshooting
- Covers the most frequent failures including PSU, GPU, RAM and storage
- Compact visual format that is easy to use while working on a PC
Cons
- Only 24 pages so coverage is introductory, not advanced board level repair
- Lacks enhanced Kindle features like X-Ray, Word Wise and Enhanced Typesetting
- Limited track record with no verified buyer feedback yet
This 24-page digital guide from Joshua Dawkins is a practical manual for diagnosing common PC hardware failures in under 30 minutes. It is built for gamers, first time builders, everyday users and small shop technicians who want fast answers without technical jargon.
Its standout strength is the technician style flowchart system that turns confusing symptoms into clear if this happens, then do this steps. You get targeted fixes for power on failures, black screens, overheating shutdowns, RAM faults and SSD issues that reflect real problems users face daily.
Design wise the guide prioritizes clarity over complexity with full color illustrations, professional checklists and simple language. As a 27.1 MB PDF it is easy to keep on a phone or second screen while you work, though it lacks enhanced Kindle features like X-Ray or Word Wise.
The main limitation is depth, as the short page count can only cover introductory diagnostics and not advanced board level repair. Beginners may also need to supplement it with video tutorials for hands on tasks like reseating components or applying thermal paste.
Overall this is a solid quick reference for anyone who wants to save time and avoid unnecessary repair shop visits. If you need a fast, structured starting point for common hardware troubleshooting, it delivers excellent value for its focused scope.
ASIN: B0G67L876Y
Author: Joshua Dawkins
Category: Maintenance, Repair and Upgrading
Language: English
File Size: 27.1 MB
Print Length: 24 pages
Publication Date: December 11, 2025
Format: PDF Kindle eBook with full color illustrations and diagnostic flowcharts
Matching a Part to Your Build
If your new build powers on with fans spinning but you get no display, start with GPU reseating and display output checks. Reseat the GPU in the primary slot, confirm PCIe power is fully clicked, and connect your monitor cable directly to the card. If that does not restore display, try one RAM stick in the manual recommended slot, then add the second stick. The guide titled How to Diagnose Computer Issues, Perform Upgrades is useful here because it walks through diagnosing issues and handling upgrades with a beginner friendly structure, which helps you avoid skipping the simple power and cable checks that often cause no display on first boot.
If your established PC stopped booting after you moved it, cleaned it, or swapped a case, prioritize mechanical checks. Remove and reinstall both GPU and RAM, inspect for dust in the slots, verify the GPU bracket is not stressed by a sagging card or tight riser cable, and make sure front panel and power cables did not loosen when you moved the system. The more focused guide titled How to Diagnose & Fix Common PC Hardware Failures maps well to this scenario because it is organized around common hardware failures with quick diagnostic paths, which helps you decide whether to reseat again, try a different slot, or look at power delivery next.
If your system shows DRAM or VGA LEDs, beeps, or boots only sometimes, treat RAM population and profiles as part of the reseat. Reseat with the manual recommended channel population, ensure both clips are fully closed, and if you had enabled a memory overclock profile, clear CMOS or load BIOS defaults and attempt to boot at JEDEC defaults before re-enabling the profile. This isolates whether the issue is seating, slot choice, or profile stability. Either reference can support this workflow, but the shorter, failure focused guide is often easier to follow when you want a quick decision tree for intermittent boots.
Common Mistakes
Forcing the GPU without releasing the PCIe latch. Many builders pull or push the card while the retention latch is still engaged, which can damage the slot or the card edge. Always release the latch with a fingertip or gentle tool, support the card from below, and lift or press straight. If your case makes the latch hard to reach under a large cooler or thick GPU backplate, remove the adjacent fan or use a non-conductive tool to avoid scraping the motherboard.
Ignoring power and clearance. An undersized PSU that does not provide recommended wattage headroom over the combined GPU and CPU draw can cause boot failures that look like seating problems, and a cooler that does not clear RAM or the case can prevent sticks from clicking fully. Before you blame the seat, confirm your PSU meets the GPU maker recommended wattage, that PCIe power cables are fully seated with clips engaged, and that your cooler and case leave room for DIMMs to be pressed straight down. Buying more VRAM than the GPU can use or mismatched memory speed for the platform will not fix a no boot, and can distract from the real issue.
Touching contacts, skipping anti-static handling, or not fully closing RAM clips. Oils and static can degrade contacts over time, and a stick that looks seated but has one clip open is not seated. Handle modules by the edges, use anti-static handling, press evenly until both clips snap, and visually confirm the stick is level and the notch is aligned. After reseating, route cables so they do not pull on the GPU power connectors or press against the RAM clips, then boot with minimal peripherals to confirm stability before you close the case.
Who Should Wait or Buy Differently
Reseating is not ideal for systems with clear electrical damage, liquid exposure, or a PSU that is already suspected to be failing, and it is not a good fit as a repeated fix if you have to reseat every week to stay booted. If your PC only boots after you flex the board, if the PCIe slot latch is broken, if DIMM slots show physical damage, or if you see scorch marks or swollen capacitors, pause and assess the underlying hardware instead of reseating again. Similarly, if you are chasing higher frame rates and your boot issue is tied to an unstable overclock or mismatched memory speed for the platform, you will get more value from stabilizing BIOS settings, verifying compatibility, or planning a platform change than from another reseat.
Frequently Asked Questions
Do I need to remove the GPU and RAM completely, or just press them in? Remove and reinstall for a proper reseat. Power down, unplug, use anti-static handling, release the PCIe latch for the GPU and open both clips for RAM, lift straight out, inspect for dust, then reinstall until you get a clear click or latch engagement. Simply pressing without releasing latches often leaves a partial connection.
Which RAM slots should I use after reseating? Follow your motherboard manual, not a generic rule. For two sticks, most boards prefer the second and fourth slots from the CPU, for one stick use the single recommended slot. Population matters for channel configuration and boot training, so using the wrong slots can cause no boot even when sticks are physically seated.
What if reseating does not fix the boot problem? Narrow the variables. Try booting with one RAM stick, try the GPU in another compatible slot if available, check display output to the correct port, and verify power connections and PSU headroom. If you recently changed firmware settings, load BIOS defaults and retry, remembering that BIOS updates and overclocking are done at your own risk and may void warranty.


Write Your Review
No reviews yet. Be the first to share your experience!